QXL.WIN
Tips on Microdrive cartridge recovery
Over the years I've recovered data from hundreds of Sinclair Microdrive cartridges and I've re-felted thousands, usually quite successfully. Here are some tips on the matter.
<< - Back to homepage (opens in this tab/window).
Re-felting
My felt pads are used by The Retro Computer Museum in Leicester
The first step in Microdrive recovery is known as re-felting. Before you put an untreated cartridge anywhere near a QL, this first step is important! Each Microdrive cartridge has a pressure pad mounted to a springy piece of metal that presses the tape against the Microdrive's read/write head. Originally they were a spongy material and they have all, without exception, degraded with the passage of time. Often they are still present and whole but they are a mess and as soon as they are used there is a very real risk that they could cause even more of a mess! In severe cases fragments of old powdery sponge material can end up being spun into the cartridge, where they don't do any favours for the data integrity and in the worst cases, can completely jam the mechanism.

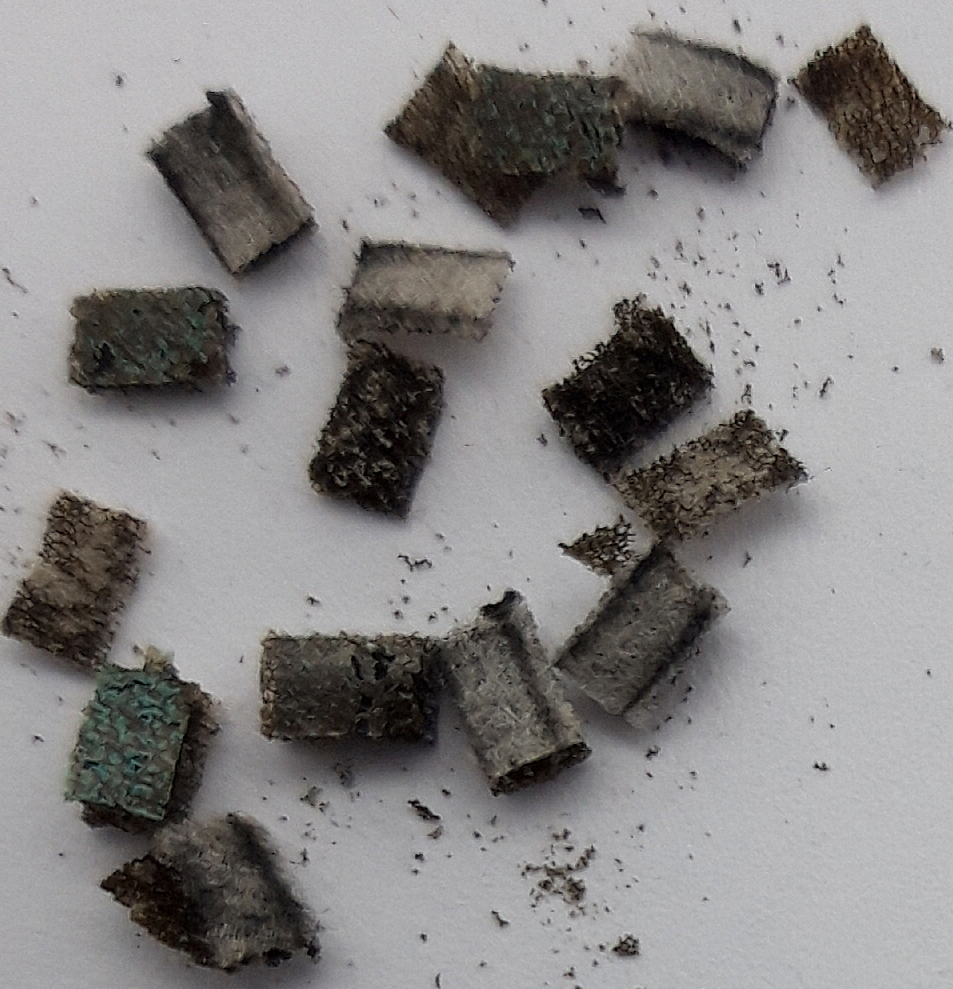
The old sponge pieces (shown above) need to be replaced with a suitable piece of felt that is 4 x 2.5mm and up to 1mm in height. For practical purposes it's best if the felt is self adhesive so that it can be stuck to the metal spring without having to use any messy adhesive. I cut my own pieces of felt from much larger self adhesive sheets. Unfortunately I've not been able to find the correct size pre-cut pieces. I can supply suitable felt pieces that I have found to be excellent for data recovery - email address is on the home page.
To re-felt Sinclair Microdrive cartridges:
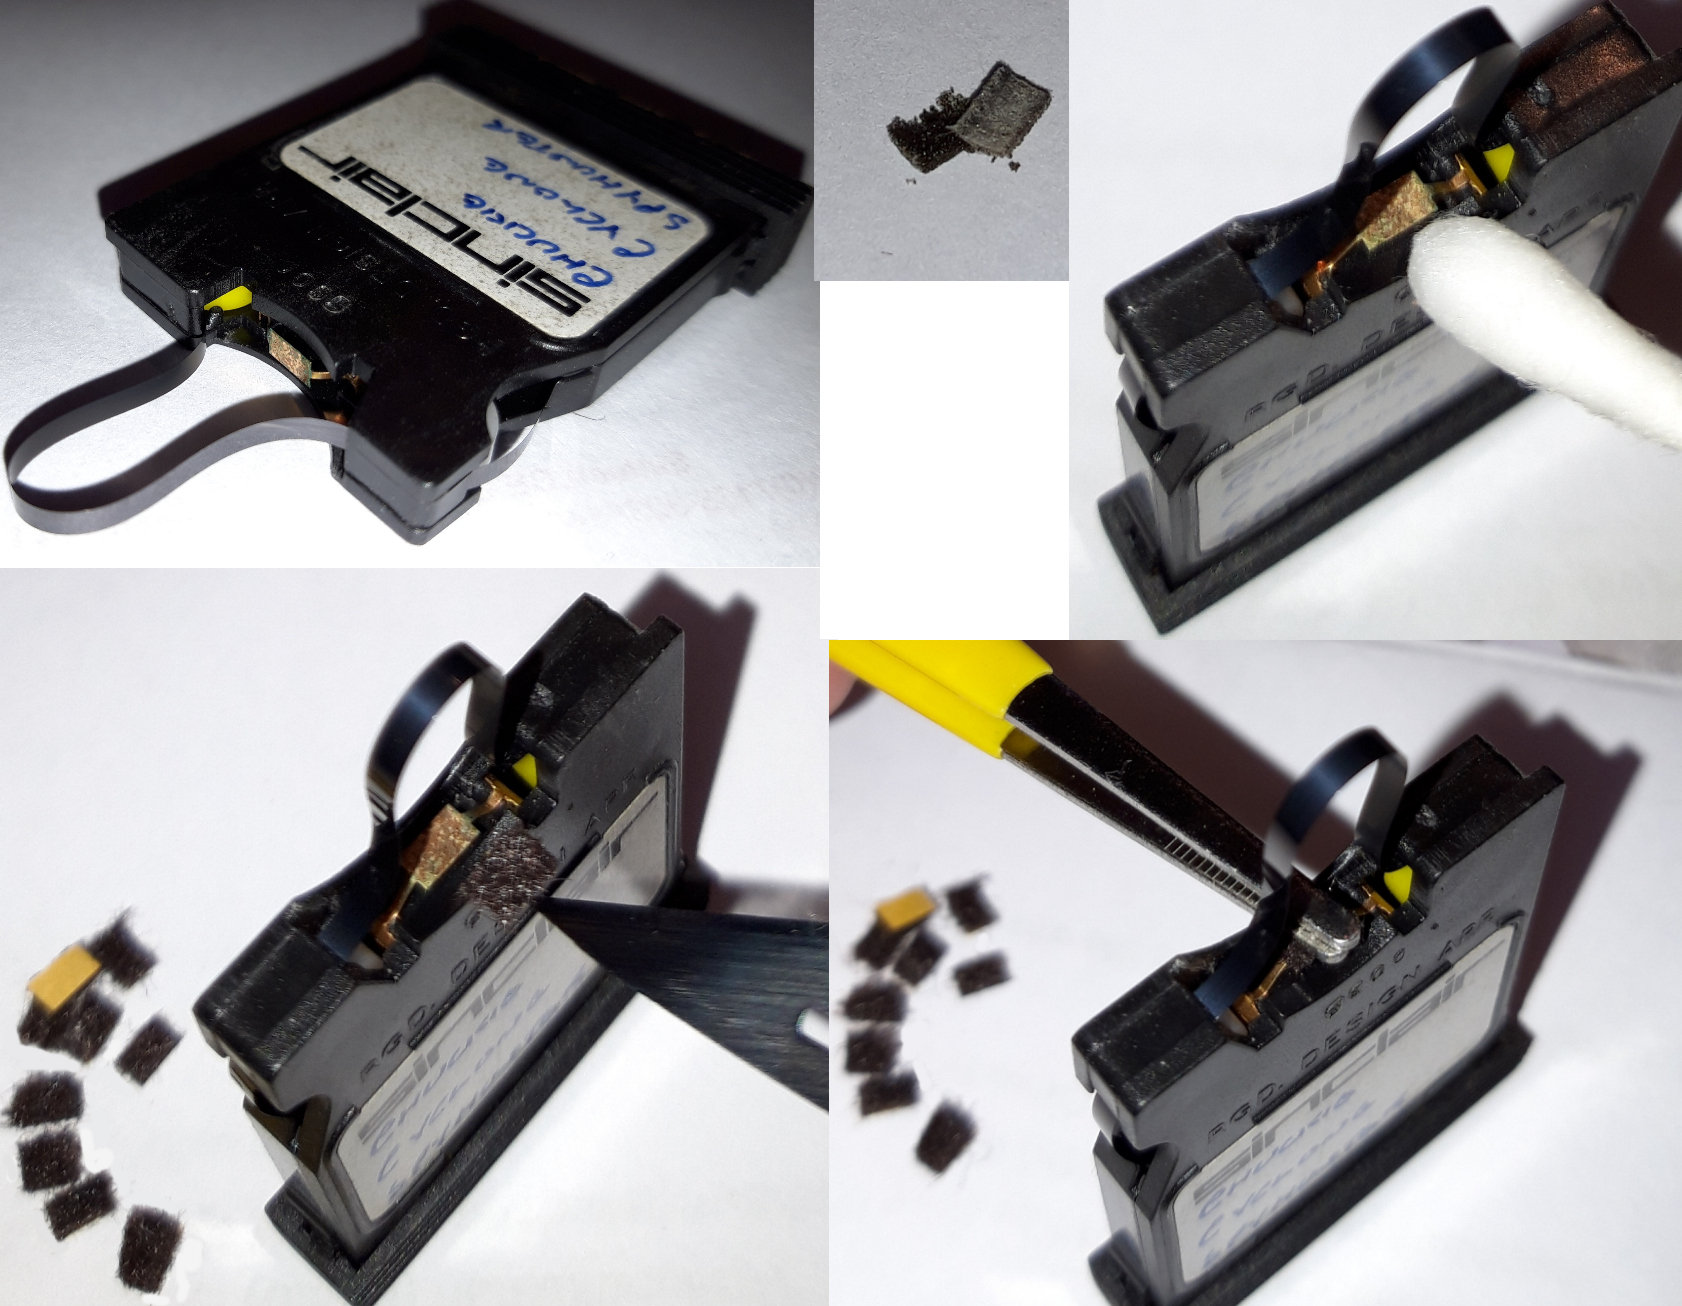
1. Use something that is smooth and not magnetic (I use a length of 1mm dia. solder wire) to pull the tape out of the opening closest to the felt pad.
2. With the felt pad pointing downwards, i.e. away from the path of the tape, scrape away the old felt pad from the metal spring. I find that the knife doesn't need to be that sharp for this, in fact I always use a different, sharper knife to cut down the felt pieces from the larger sheet. Sometimes the pad will just fall off, leaving a clean and shiny metal surface. Other times it will be stubborn and leave a verdigris residue on the copper-alloy spring - if this happens, gently scrape away the residue and any verdigris, being careful not to dislodge the metal spring, which is clipped under the plastic (sometimes not that well) at each end. Sometimes a cotton bud soaked in isopropanol can help, but I find a blade is far more effective. Incidentally, there are two types of metal spring, the most common type (shown above) has a prominent platform for the felt/sponge piece with thin 'shoulders' on either side and the other lacks the thin shoulders and is shaped more uniformly like a strip. The surface where the original pad once was does not have to be surgically clean, but it should be free of large debris and most importantly is should offer a good surface for the new felt pad to adhere to. Blow the area gently to ensure any pieces of the old felt pad do not enter the tape mechanism.
3. Place the new piece of felt on the tip of a blade and remove the backing paper. Position the felt pad over the original pad position and use something else to press it gently down onto the metal spring (I use a pair of tweezers). If the pad is slightly wider than the metal, I find that there is generally a little clearance for a tiny amount of over-hang on the bottom (non label) side of the cartridge. With the pad in place, pull the blade away sharply and push down on the pad to ensure it is evenly adhered. The spring should move down freely without the new pad fouling (and sticking to) the plastic.
4. With the new pad in place, use something (I use something made of rubber) to rotate the exposed tape and wheel on the left downwards, until the slack has moved into the mechanism.
Recovering the data:
(note that ZX Spectrum cartridges cannot be read with a QL, nor can they be recovered with ÁDump. The same applies to ICL OPD/Merlin Tonto cartridges)
If the cartridge is not a branded retail cartridge that contains, e.g. personal files, documents etc, then simply insert it into a known good Microdrive and read the directory with the 'dir' command. View the list of files and manually copy them with the 'copy' command, or 'wcopy' command (if you have Toolkit II, which really makes things much easier). Obviously it's best to copy the files to a 'win' or 'flp' device where they will be safer than on another Microdrive cartridge, but if you only have other cartridges available and have an original QL setup with two working Microdrives, then making duplicates of files onto other cartridges certainly can't hurt, but isn't very useful if you want to move the data over to a modern computer. If you have a ram disk and Toolkit II, a quick way of making a copy of a whole cartridge is with the command 'format ram1_mdv1' (or mdv2) which will copy all the files onto the ram disk - these can then be accessed via the ram device, in fact if files have not been successfully copied to ram they will appear with an asterisk suffix in the dir list of ram files, which is useful to know. From the ram device the files can be copied to another medium, e.g. another Microdrive cartridge. Don't forget that the content of the ram disk will disappear forever if the computer is reset or powered off.
For cases where some files cannot be recovered or for commercial retail cartridges when it is more important to produce a proper cartridge image (or 'dump'), i.e. an exact copy of each sector of data, then I recommend...
ÁDump
ÁDump (or sometimes mDump) by Daniele Terdina is my preferred Microdrive imaging software. Not only does it try to recover each sector, but it will try multiple times and is very clever about how it goes about it. ÁDump comes with Daniele's equally excellent Q-emuLator - QL emulator software, but isn't all that easy to find within the installation. Make sure you have the latest version of Q-emuLator as sometimes changes are made to the version of mDump that it includes (it is also an idea to ask Daniele if you have the latest version, either over email or on the QL Forum - he's a member there).
On my windows version the program can be found in the 'Program Files (x86)/Q-emuLator/QL Software/FileUtil/' path and is named 'mdump_task'. This file needs to be exec'd on a QL, e.g. with the command 'ew flp1_mdump_task', assuming the mdump_task program was on floppy drive 1 (flp1_) and it will require a target that has more storage space than another Microdrive cartridge, so to use it you will need a working floppy drive at the very least (but it also works with win1_ or any other storage device). Getting files from a non QL computer, e.g. a modern PC, onto a QL can be tricky at first. I won't get into that here, instead I'd recommend Dilwyn Jones' website or the QL Forum for further information on that subject.
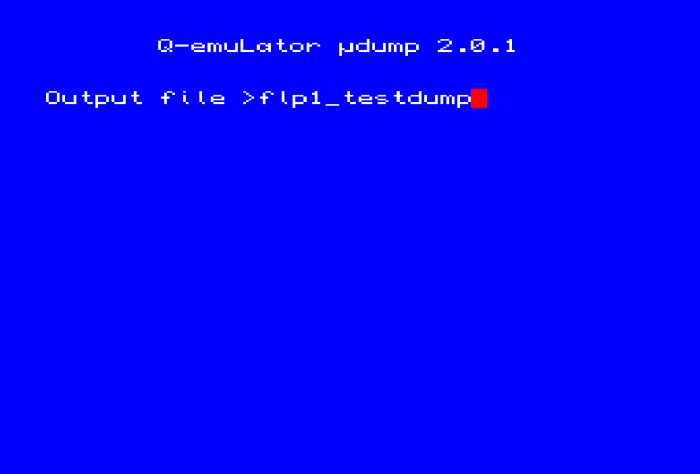
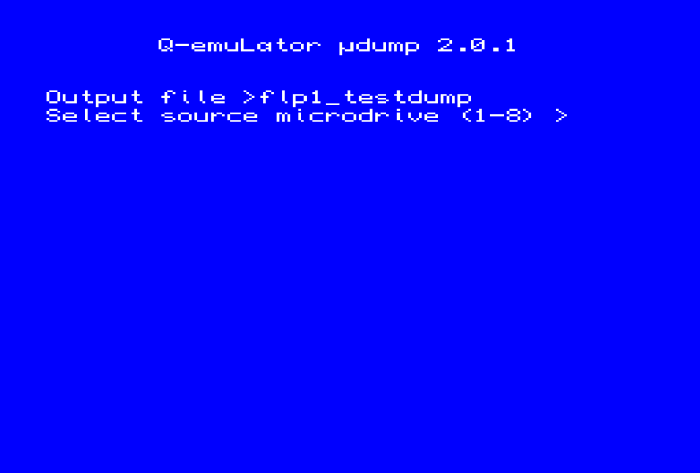
When you run mdump_task it will initially ask you for an Output file. This name should also include the full path (destination and file name) of where you want the finished dump file to be saved. For example, if you want to save the file as 'testdump' on flp1_ then enter 'flp1_testdump'. After that it will ask you to press a number between 1 - 8, corresponding to the drive number that the cartridge to be dumped has been inserted into (if it hasn't been inserted yet, make sure it is, as after you enter the number, it will whizz into life)!
mdump_task will spin through the whole cartridge a few times, showing a graphical representation of the cartridges' sectors along the way. If you're very lucky these will eventually all be green.
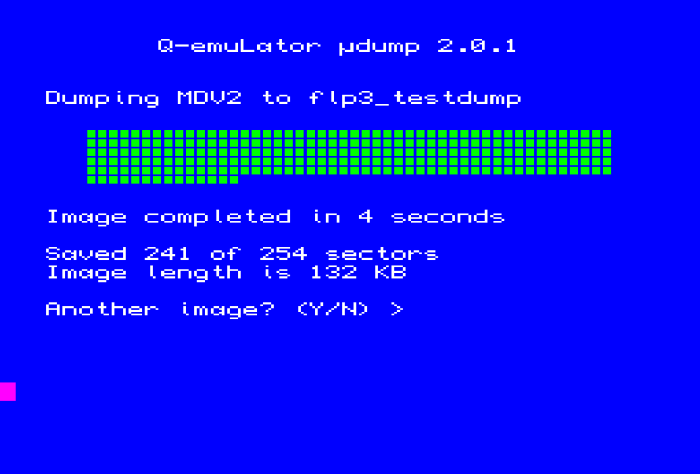
In most cases they won't all be green and it will ask if you would like to re-try. Before you answer it can be a good idea to remove the cartridge and try inserting it again in a slightly different position, i.e. pulled out a fraction of a mm, or a fraction of a mm angled slightly left or slightly right. It's also a good idea to visually inspect the newly re-felted spring, just to make sure that the felt is still stuck in place and that the spring itself has not become dislodged from either of its clipped ends.
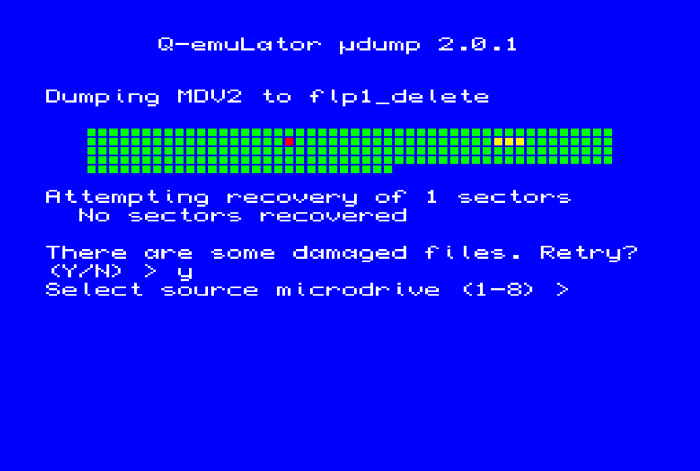
It's also a good idea to try the other Microdrive slot, which is the next question it will ask (Select Source Microdrive). If none of these steps result in a perfectly green grid of sectors and you don't think it's going to do any better, answer 'no' to the question about retrying. mDump will then show an on-screen report which will include the name(s) of the file(s) with bad sectors that it was unable to recover. Note that the small cluster of yellow sectors usually represents the join in the tape, which should be marked as 'bad' by QDOS and will therefore not contain any important data.
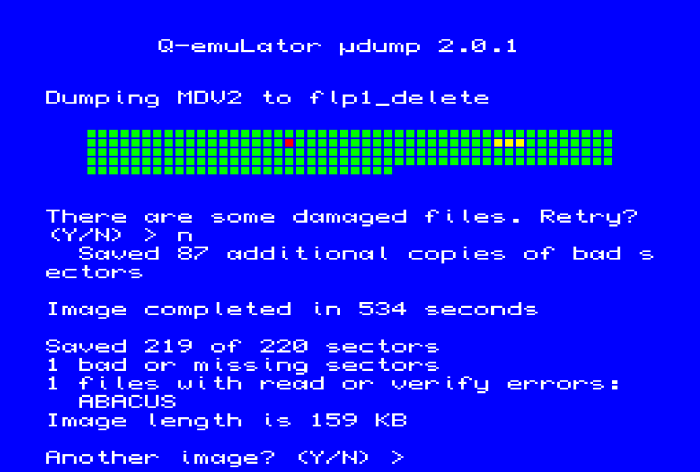
Sometimes the bad sectors are within non critical files, that do not affect the function of the software, e.g. a loading screen or the clone_bas file, but in the case shown above, it's actually the 'ABACUS' file which is bad, and that happens to be the main executable. So that is an unsuccessful dump (even though the bad sector could well be a part of the code of that file that is non-critical, but it certainly will have a fault somewhere and is likely to be unstable).
I have found in the past that sometimes the ambient temperature can also play a part, so by all means try the process again on a warmer/colder day or in a warmer/colder room. Previously I've also tried putting cartridges in the fridge for a while beforehand (out of desperation), but don't think that actually made much difference for me. I've had cartridges before that had lots of bad sectors and that I'd pretty much written off - only to try months later and find that everything could be recovered! Sometimes there there seems to be no logic to it. If you're dumping commercial QL software and a particular cartridge has stubborn bad sectors, try another copy of the software in the other drive (if you're able to find another) - I've been able to get a good dump from a combination of two identical original cartridges in the past, as invariably the bad sectors are in different places - but this only works if the two (or more) original cartridges are absolutely identical in every way, i.e. made from the same master originally, otherwise it won't work.
Once you have a successful Microdrive cartridge dump, this resultant file can be moved across to modern computer and can be used with Q-emuLator (and other emulators, but Q-emuLator is best suited for Microdrive image manipulation). You will need to give the file an .mdv extension, simply by renaming it, otherwise it will not be visible when you attempt to attach it to one of Q-emuLators eight drive slots. The image file is an exact sector-for-sector copy of the original Cartridge, which means that any copy protection will also be carried over to the image file and its behaviour in Q-emuLator will be the same as on a real QL. Note that a lot of commercial software required both Microdrive slots one and two to be populated, usually with a copy (generated from the original - usually they included a copy program called 'clone_bas') in slot one and the original in slot two. Check the printed instructions that came with the original cartridge and/or the SuperBasic 'boot' file.
<< - Back to homepage (opens in this tab/window).